
Last Updated: October 30, 2026
Quick Summary
A cabinet installation defect inspection checks each cabinet for level, plumb, secure fixing, even gaps and working doors and drawers before you sign off the work. Walk the kitchen in a fixed order, measure every fault, and record each defect with a severity rating.
- Agree the scope and finish standard with your installer, and get it in writing before work starts.
- Check level with a spirit level at least 600 mm long, against the manufacturer's stated tolerance.
- Treat any cabinet that is not fixed to the wall or moves when leaned on as critical.
- Rate each defect Critical, Major or Minor, and photograph it with a tape measure or feeler gauge in shot.
- Send the completed defect record to your installer the same day and ask them to confirm receipt in writing.
Table of Contents
- Planning Your Cabinet Installation Defect Inspection
- Kitchen Cabinet Installation Checklist: Room-by-Room Walkthrough
- Checking Cabinet Alignment, Level and Plumb Before Handover
- Identifying Common Cabinet Installation Defects and Their Severity
- Testing Doors, Drawers, Hinges and Hardware Operation
- Recording Defects With a Cabinet Defect Report Template
- Inspection Tools to Bring to Your Cabinet Installation Walkthrough
- Booking Your Cabinet Installation Handover With East Coast Joinery Solutions
- Frequently Asked Questions
Planning Your Cabinet Installation Defect Inspection
Most cabinet problems are found too late. Before you commit to a supplier, read why flat-pack kitchen cabinets often fall short on fit, durability and long-term value.
Start by agreeing on the scope with your installer. Know which cabinets, drawers and panels are included, and what the finish standard is.
Gather your documents before the inspection day:
- Your signed quote and written scope of work
- Measurements and plans for the cabinet layout
- Product details, including colour and finish codes
- Any warranty terms for cabinetry and hardware
Choose a time when you can see the whole kitchen with good light. Morning daylight works well.
Here's the thing most people miss: a defect report is only useful if it's specific. "The kitchen looks off" won't get anything fixed.
Kitchen Cabinet Installation Checklist: Room-by-Room Walkthrough
Work through the space in a fixed order. Start at the entry, then move clockwise around the room. This stops you from skipping areas.
For each zone, check:
- Wall and floor condition behind the cabinets
- Cabinet position against the plan
- Fixing points and secure attachment
- Finish, colour and surface damage
Walk the room twice. The first pass is a general look. The second pass is detailed, with a torch and a spirit level in hand.
A common mistake is inspecting only the visible front faces. Open every door and pull out every drawer.
Checking Cabinet Alignment, Level and Plumb Before Handover
Alignment is where cabinet defects show up most clearly, but "looks level" is not a check. You need numbers. Where your manufacturer's installation instructions specify a tolerance, that figure should be used.
Work cabinet by cabinet in a fixed sequence: base cabinets first, left to right along the run; then wall cabinets, left to right; then tall cabinets and end panels.
Measurable checks and typical tolerances
- Level along a run: place a spirit level at least 600 mm long on the top edge of each base cabinet, end to end and front to back. Confirm the acceptance figure against your manufacturer's instructions.
- Plumb on end and corner panels: check vertically in two directions. Check the tolerance stated in your manufacturer's instructions.
- Reveal gaps between doors and drawer fronts: measure at the top, middle and bottom of each gap with a feeler gauge. The key test is consistency between adjacent gaps.
- Door and drawer front alignment: sight along the run and check that adjacent fronts sit flush within 1 mm. A front that stands proud or sits back will show as a shadow line.
What to do with an out-of-tolerance result
Mark the cabinet on your record, photograph the level or feeler gauge in the shot so the reading is visible, and note the measured figure. Do not attempt to adjust shims or fixings yourself, as an unstable cabinet can tip. Report the measurement to the installer and ask for the cabinet to be re-levelled or re-fixed before handover.
Identifying Common Cabinet Installation Defects and Their Severity
Most checklists stop at "look for gaps and scratches". A useful inspection goes further: it gives you a repeatable sequence, a measurable acceptance test for each defect type, and a severity scale that tells you whether to accept, monitor or require rectification before handover.
The cabinet-by-cabinet inspection sequence
Work through the kitchen in this order so nothing is missed:
- Base cabinets, left to right. For each cabinet: check the carcass is square, the cabinet is level and plumb, fixings are present and tight, the door and drawer fronts align, and the interior is clean and undamaged.
- Wall cabinets, left to right. Check the wall fixing, the cabinet's level and plumb, door alignment, and clearance to the worktop and range hood.
- Tall cabinets and end panels. Check plumb in two directions, fixing to the wall and adjacent cabinets, and that end panels are flush with door fronts.
- Appliance housings and sink cabinets. Check clearances, moisture staining, and that the cabinet is not carrying the weight of the appliance or benchtop.
- Plinths, fillers and scribes. Check that gaps to walls and floors are closed consistently and that fillers are fixed, not just wedged.
Structural fixing and stability checks
Before you test anything that involves leaning or pulling, confirm the cabinet is secure. Check that wall cabinets are fixed with the specified anchors into a suitable substrate. Confirm the fixings are tight and match the manufacturer's specification.
If a cabinet is not securely fixed, record it as critical and do not test doors, drawers or loading until the installer has made it safe.
Severity and acceptance criteria
Use this scale to decide what happens next:
- Critical, rectify before handover. Cabinet not fixed to the wall or substrate; cabinet unstable or able to tip; water damage or swollen panels; fixings missing or pulled out; appliance housing unable to carry the appliance. These are safety and structural issues, not cosmetic ones.
- Major, rectify before handover or agree a dated remedy in writing. Level or plumb outside tolerance; reveals that vary noticeably; doors that rub, sag or will not stay closed; drawers that stick or scrape; benchtop that rocks; clearances below the manufacturer's specification.
- Minor, may be accepted with a written remedy date. Minor scratches or chips that do not penetrate the finish; hardware needing a quarter-turn to tighten; a filler that needs a small amount of sealant.
Common defects and what to measure
- Uneven reveals: measure at several points per gap and compare; noticeable variation is major.
- Doors out of alignment: check that doors sit flush; a door standing proud is major.
- Loose hinges and runners: test each fixing with a screwdriver; any movement is major.
- Moisture near sink and dishwasher: look for staining, swelling or soft edges.
The article sorts defects into three severity levels, each with a clear action.
| Severity | Typical defects | Action before handover |
|---|---|---|
| Critical | Cabinet not fixed to wall; cabinet unstable or able to tip; water damage or swollen panels; fixings missing or pulled out | Rectify before handover |
| Major | Level or plumb outside tolerance; uneven reveals; doors rubbing or sagging; drawers sticking; benchtop rocking; clearances below specification | Rectify before handover or agree a dated remedy in writing |
| Minor | Scratches or chips not penetrating the finish; hardware needing a quarter-turn; filler needing sealant | May be accepted with a written remedy date |
Testing Doors, Drawers, Hinges and Hardware Operation
Test every moving part. Open and close each door fully, then check how it stops.
For drawers, pull each one all the way out and push it back in. Listen for scraping.
Check the hinges by looking for:
- Doors that sit even in the opening
- Hinges that are tight and not visibly bent
- Soft-close mechanisms that work consistently
Handles should be tight and aligned with each other across a run. Give every handle a firm tug to see whether it moves.
Do this test with the cabinets empty if you can. Load weight can hide problems.
Recording Defects With a Cabinet Defect Report Template
Write everything down as you go. A simple defect record saves arguments later. Use this template:
Defect record
- Cabinet and location: (for example, "Base cabinet, left of sink")
- Defect type: (gap, alignment, scratch, hardware, moisture)
- Severity: Critical / Major / Minor
- What you observed: (describe the defect in one or two sentences)
- Photo reference: (file name or number)
- Requested fix: (realign, replace, tighten, refinish)
- Agreed completion date: (date)
- Status: Open / Fixed / Accepted
Take a photo of every defect, with a tape measure or spirit level in the shot where it helps show the size. Number each photo so it matches the record.
Send the completed record to your installer the same day. Ask them to confirm receipt in writing.
Inspection Tools to Bring to Your Cabinet Installation Walkthrough
You do not need expensive equipment, but a few tools make the inspection far more accurate:
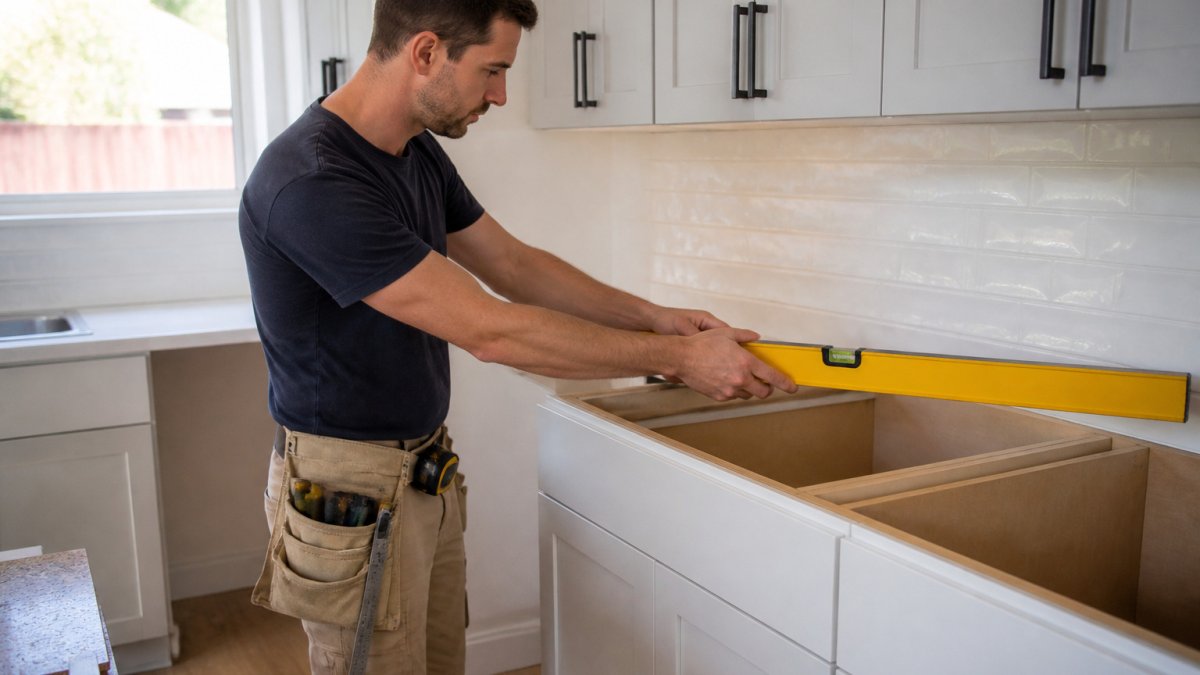
- A spirit level, at least 600 mm long, for alignment checks
- A tape measure for checking reveals and clearances
- A torch to look inside cabinets and under sinks
- A feeler gauge or thin card to measure small gaps
- A phone camera for photographic evidence
A homeowner checking a freshly installed base cabinet with a spirit level is a familiar scene on handover day. Bring the level and check the top edge of every run.
Booking Your Cabinet Installation Handover With East Coast Joinery Solutions
A handover goes smoothly when the installer knows what you will check. Tell them in advance that you plan a full inspection, and book enough time for the walkthrough and any fixes.
If you are arranging a handover on a project with East Coast Joinery Solutions, request a free quote to talk through scope and timing before work begins. For questions to ask any installer first, read 10 questions to ask before hiring a kitchen installer. If you want to see how a professional install is set up for alignment and site prep, read professional cabinet installation for builders.
Make sure your installer confirms the handover date and walkthrough time in writing. That way, the inspection is on the calendar before the kitchen is finished, not after.
Frequently Asked Questions
What should be checked after cabinets are installed?
After installation, check that every cabinet is level and plumb, that doors and drawers open and close freely with even reveals, that hinges and handles are tight, and that the carcases are secured to the wall and to each other. Look for scratches, chips and colour mismatches on the surfaces, and confirm that the sink, dishwasher and appliance openings have the clearances you agreed. Test the cabinets with normal use before signing off, and record anything that falls short in writing with photographs.
How do you inspect kitchen cabinet installation?
Work through the kitchen one cabinet at a time, starting at one end and moving in a single direction. Check each run with a spirit level, then review gaps between doors and frames, the alignment of worktops, and whether the fixings are secure. Open and close every door and drawer, and check the soft-close action if fitted. Using a checklist keeps the inspection systematic and makes it easier to show the builder exactly where each issue sits.
What are common defects in cabinet installation?
The most common cabinet installation defects include cabinets out of level or plumb, uneven gaps and reveals, doors that rub or sit proud, drawers that stick, loose hinges and handles, and damaged or scratched finishes. Moisture-related issues such as swollen panels can also appear where cabinets sit close to sinks or dishwashers. Note the severity of each defect so it is clear which items need urgent rectification and which are cosmetic.
How do you document a cabinet installation defect?
Record each defect with its location (room, wall and cabinet number), a clear description, a photograph taken from a consistent distance, the date, and a severity rating. Use a cabinet defect report template so every item is recorded in the same format. Share the completed record with the installer in writing so there is a dated reference for rectification and any later warranty discussion.
